
Founded in 2009, Alicosolar manufactures solar cells, modules, and solar power systems, mainly engaged in the research and development, production and sales of PV modules; power stations and system products etc. Its cumulative shipments of PV modules had exceeded 80GW.
Since in 2018, Alicosolar expands business includes solar PV project development, financing, design, construction, operations and management, and one-stop system integration solutions for customers. Alicosolar has connected over 2.5GW of solar power plants to the grid worldwide.
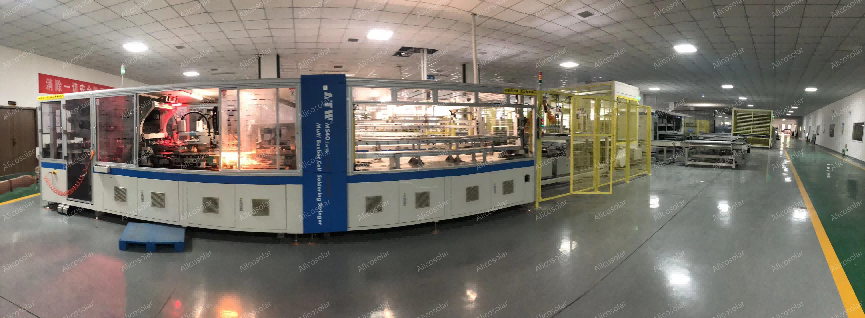
Our work shop
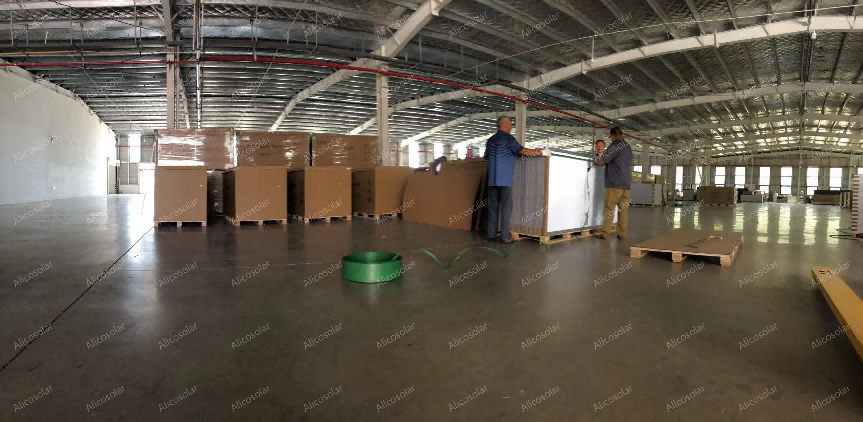
Our warehouse
All grade A solar cell, Exempt from inspection
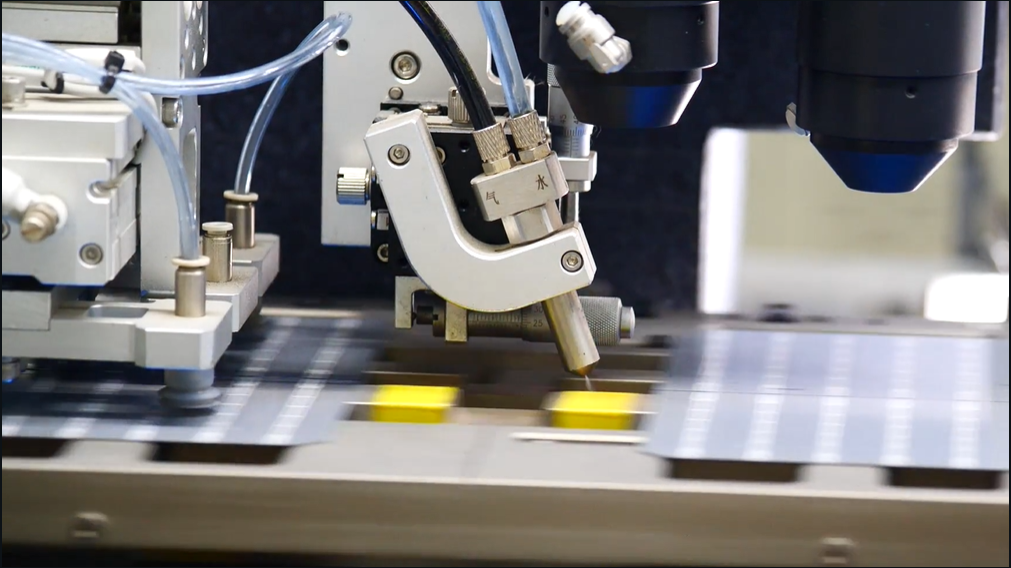
Step 1—Laser Scribling,significantly increases wafer output per unit mass
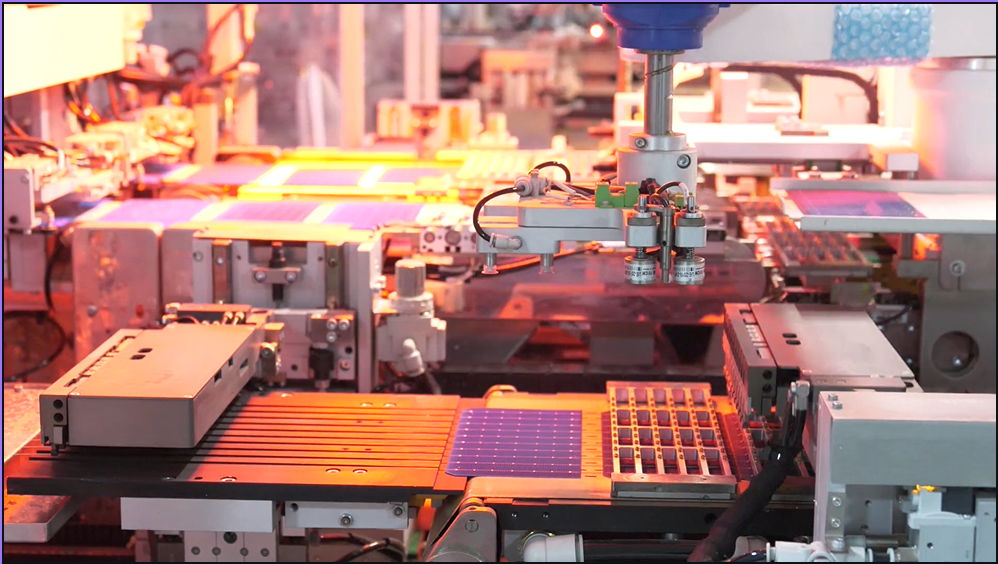
Step 2—String welding
Meantime—Laminating AR coating tempered glass, EVA and then pile high waiting
Step 3—Automatic typesetting Machine on waiting glass and EVA
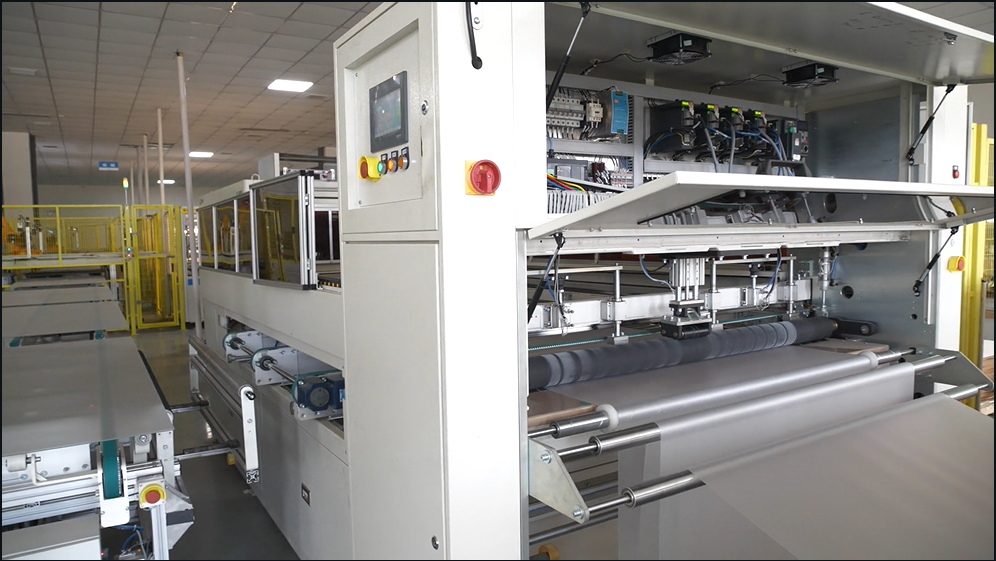
Step 4—Laminated welding and Lamination.
Use a Laminated welding machine (different welding tooling for cells of different sizes) to weld the middle and both ends of the typed cell string respectively, and perform image positioning, and then automatically attach high-temperature tape for positioning.
Step 5—The battery string, glass, EVA, and backplane are laid according to a certain level and ready for lamination.(Laying level: from bottom to top: glass, EVA, battery, EVA, glass fiber, backplane).
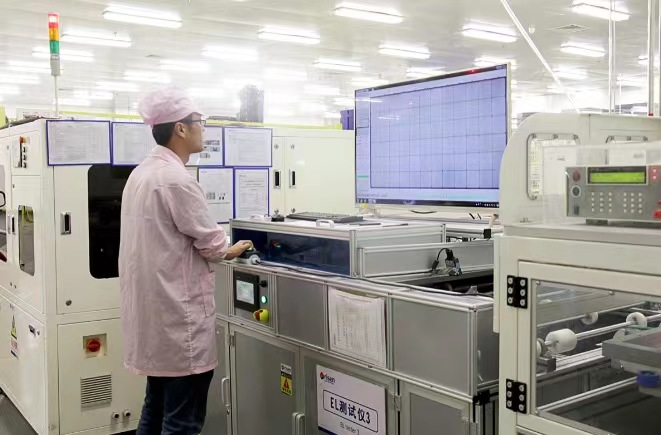
Step 6—Appearance and EL Test
checking whether there are small bugs, whether the battery is cracked, missing corners, etc.Unqualified cell will be return.
Step 7—Laminated
The laid glass/battery string/EVA/back sheet pre-press will automatically flow into the laminator, and the air in the module will be pumped out by vacuuming, and then the EVA will be melted by heating to bond the battery, glass and back sheet together , and finally take out the assembly for cooling. The lamination process is a key step in the production of components, and the lamination temperature and lamination time are determined according to the properties of EVA. The lamination cycle time is about 15 to 20 minutes. The curing temperature is 135~145°C.
Primary process controls: air bubbles, scratches, pits, bulges and splinter
Step 8—Module Process Framing
After lamination, the laminated parts flow to the frame, and the inner wall of the inner wall is automatically punched after the machine position, and the automatic frame is punched and mounted on the laminator. The corners of the components are convenient for engineering installation.
Main process controls: pits, scratches, scratches, glue spills on the bottom, installation bubbles and glue shortages.
Step 9—Solidity
The components with the frame and the junction box installed in the front channel are put into the curing line through the transfer machine. The main purpose is to cure the sealant injected when the frame and the junction box are installed, so as to enhance the sealing effect and protect the components from the subsequent harsh external environment. influences.
Main process controls: curing time, temperature and humidity.
Step 10—Cleaning
The component frame and junction box coming out of the curing line have been fully bonded together, and the sealant has also been fully cured. Through the 360-degree turning machine, the purpose of cleaning the front and back sides of the assembly on the assembly line is achieved. It is convenient to pack in files after the next test.
Main process control: scratches, scratches, foreign bodies.
Step 11—Test
Measure electrical performance parameters to determine components level. LV test – measure the electrical performance parameters to determine the grade of the component.
Post time: Jul-28-2022